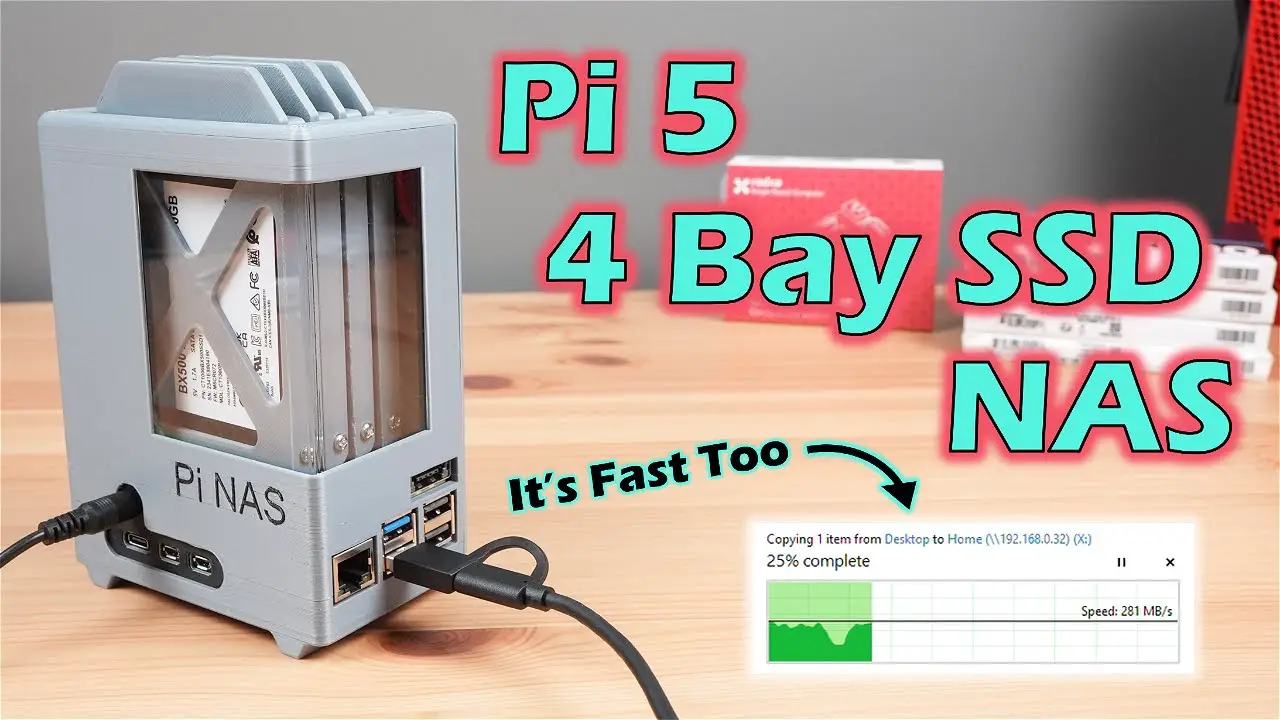
Today we’re using the Radxa Penta SATA Hat to build our own high speed NAS with a Rapsberry Pi 5 and all solid-state storage.
ADDITIONAL INFORMATION
—————————————————
Visit my blog for the full guide and 3D print files – https://www.the-diy-life.com/i-built-a-4-bay-raspberry-pi-5-based-nas/
Download the 3D Print Files to build your own NAS – https://bit.ly/3K7robG
PURCHASE LINKS
—————————————————
Raspberry Pi 5 – https://amzn.to/44I8sKq
Raspberry Pi 5 Active Cooler – https://amzn.to/3QH8hsJ
Radxa Penta SATA Hat (Pi 5 Kit) – https://bit.ly/3yrHsT2
Sandisk 32GB MicroSD Card – https://amzn.to/3JW6zjJ
12V 3A Power Supply – https://amzn.to/3UxVdqS
4 x Crucial 2.5″ BX500 SSDs – https://amzn.to/3QEfMAM
Noctua 40mm 5V Fan – https://amzn.to/3UY4fPw
M2.5 Button Head Screws – https://amzn.to/4bv95ce
M2.5 Brass Inserts – https://amzn.to/4blw0Hw
M3 Button Head Screws – https://amzn.to/3UY8pH2
Wavelink 2.5G Ethernet Adaptor (Optional) – https://amzn.to/3wDTfgA
Tool & Equipment Used:
Bambulabs X1C 3D Printer – https://bit.ly/3wtxQXz
USB-C Pencil Screwdriver – https://amzn.to/3WWaMf1
TS100 Soldering Iron – https://amzn.to/3UUibKg
Brass Insert Tips – https://amzn.to/4bcey8g
Gweike Cloud Laser – https://bit.ly/3qbXvNx
Acrylic Bending Tool – https://amzn.to/4beqMx4
Some of the above parts are affiliate links. By purchasing products through the above links, you’ll be supporting this channel, at no additional cost to you.
CHAPTERS
—————————————————
0:00 Intro
0:23 Radxa Penta SATA Hat
2:17 NAS Components
3:09 Designing The Enclosure
4:43 Making The Components
6:08 Assembling The NAS
8:23 OMV Installation
10:03 Testing The NAS
If you’ve got any ideas for Raspberry Pi, Arduino, or other Electronics projects or tutorials you’d like to see, let me know in the comments section.
source