If you have purchased the Official Raspberry Pi Touch Screen and it’s upside down then you are not alone. Follow this quick guide to rotate your LCD Screen now!
Another reason could be because you are trying to play Retro Games in a portrait mode instead of horizontal. This can help you too! Or maybe you are running a Kiosk and need the LCD monitor in a different orientation for customers. Keep reading for how to make all these methods work for you.
HARDWARE LIST
- Raspberry Pi
- Micro SD Card
- USB Keyboard
- USB Mouse (Optional)
- HDMI Cable
- Ehternet Cable or USB WiFi Adapter (Optional)
- USB Micro SD Card Reader
- Raspberry Pi Case (Optional)
SOFTWARE LIST
- Raspbian Stretch Lite Image
- Etcher Image Writing Software (Windows, Mac or Linux)
Access the Terminal
The Terminal is a text-based interface that allows a user to make changes quickly through specific commands and instructions. This is similar to the command prompt or DOS Prompt in Microsoft products and shares many similar qualities.
In order to change the orientation of the screen we first need to be able to access the Terminal, however, accessing the Terminal differs depending on what system you are using on the Raspberry Pi.
Retropie
Rertopie is to games what Kodi is to media. If you haven’t checked out Retropie before and love Retro Games, then check out our easy to follow How To Install RetroPie Guide.
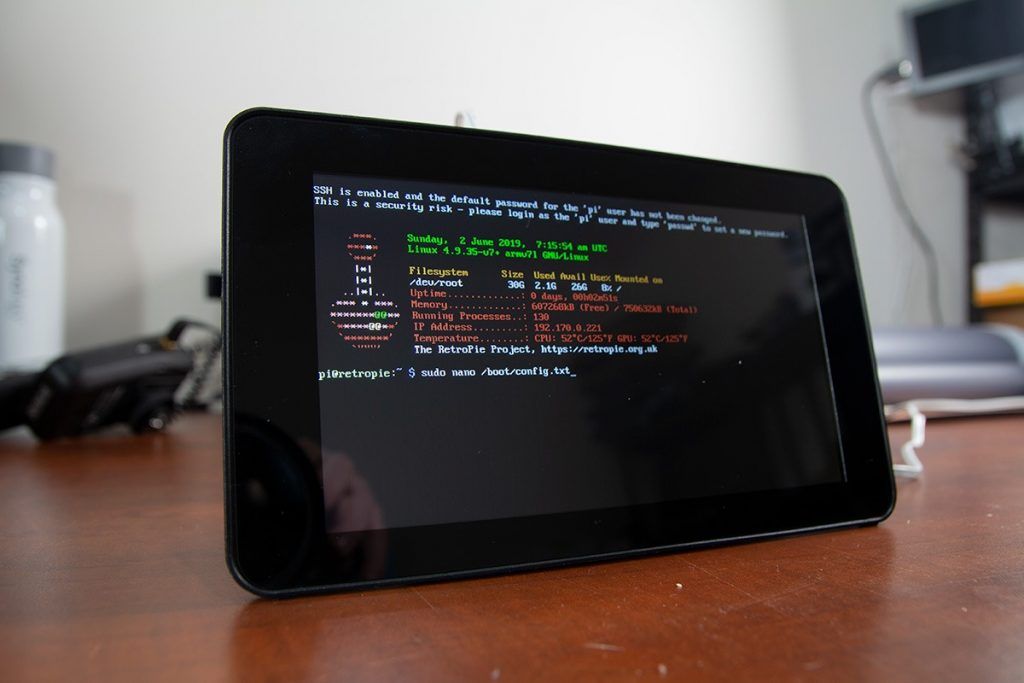
Once your RetroPie has fully loaded getting to the Terminal screen is very simple. All you need to do is hold down the SHIFT key and press F4. Now you should be seeing a screen similar to the one below!
Raspbian
Raspbian is a desktop operating system similar to Windows or Linux Desktops. The Raspberry Symbol is like the Start menu and gives you access to most software within Raspbian. You can check out our installing raspbian guide for more details.
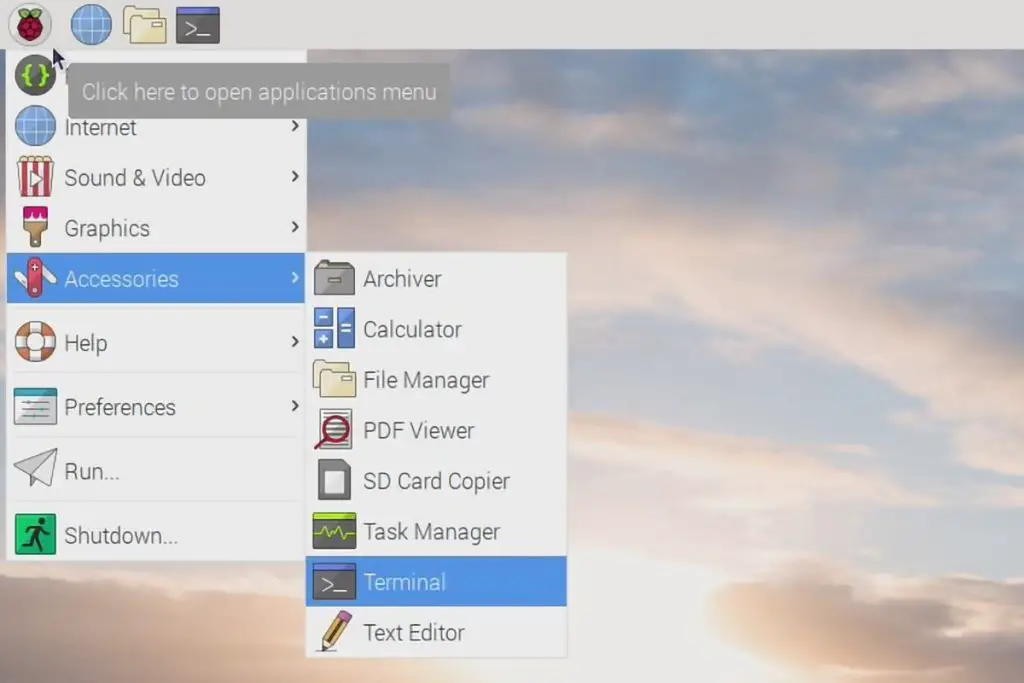
When you reach the desktop of your Raspbain installtion, gaining access to the terminal is done through the Raspbian Menu. First open the Raspbian menu and then choose the accessories menu. Clost to the bottom of this list you will see the Icon and Text for Terminal. Click this and you are ready to continue following this guide.
Rotating a Screen
For those out there that may not have Touch Screens, you can find two different methods here. One method can be used if you are on a touch screen and another in case you are using a standard monitor.
Rotate a Touch Screen
Once you have access to the terminal, you need to type the following command to open the configuration file for the Raspberry Pi system.
sudo nano /boot/config.txt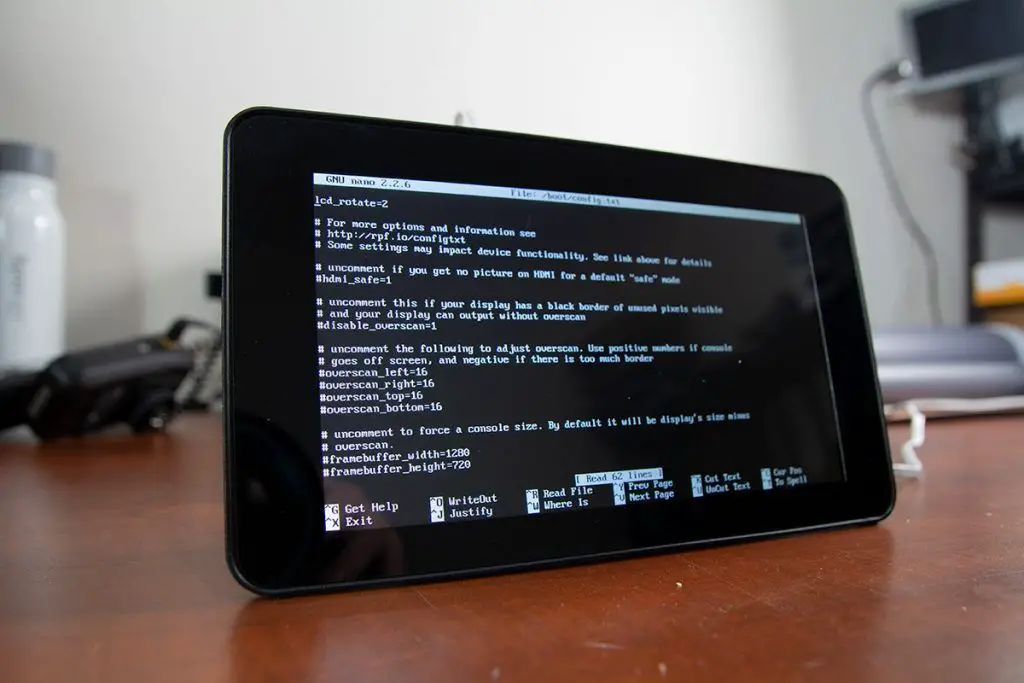
Next, we need to add the following text to the top of the config file. Change the number to the following for different orientations. 0 is for no change. 1 is to rotate 90 degrees. 2 is to rotate 180 degrees. And 3 is to rotate 270 degrees. This will rotate both the display and the touch screen at the same time.
lcd_rotate=2Press Control + X to exit, then Y to save changes and ENTER to accept changes. Now we just need to do a quick reboot
sudo rebootNow your screen should be in up the right way. If you have a non-touch screen or standard display, then repeat the process but instead of lcd_rotate use the following text.
display_rotate=2Final Thoughts
Breaking down all the steps, it’s very easy to rotate the touch screen on a Raspberry Pi.
- Open the Terminal screen.
- Access the config file using sudo nano /boot/config.txt
- Enter a new line with the text lcd_rotate=2
- Press CONTROL+X then Y then ENTER to Save
- Type sudo reboot to reboot and your LCD will be rotated!
Now your Raspberry Pi’s screen will be rotated to the correct way without needing to turn your head to the side.


