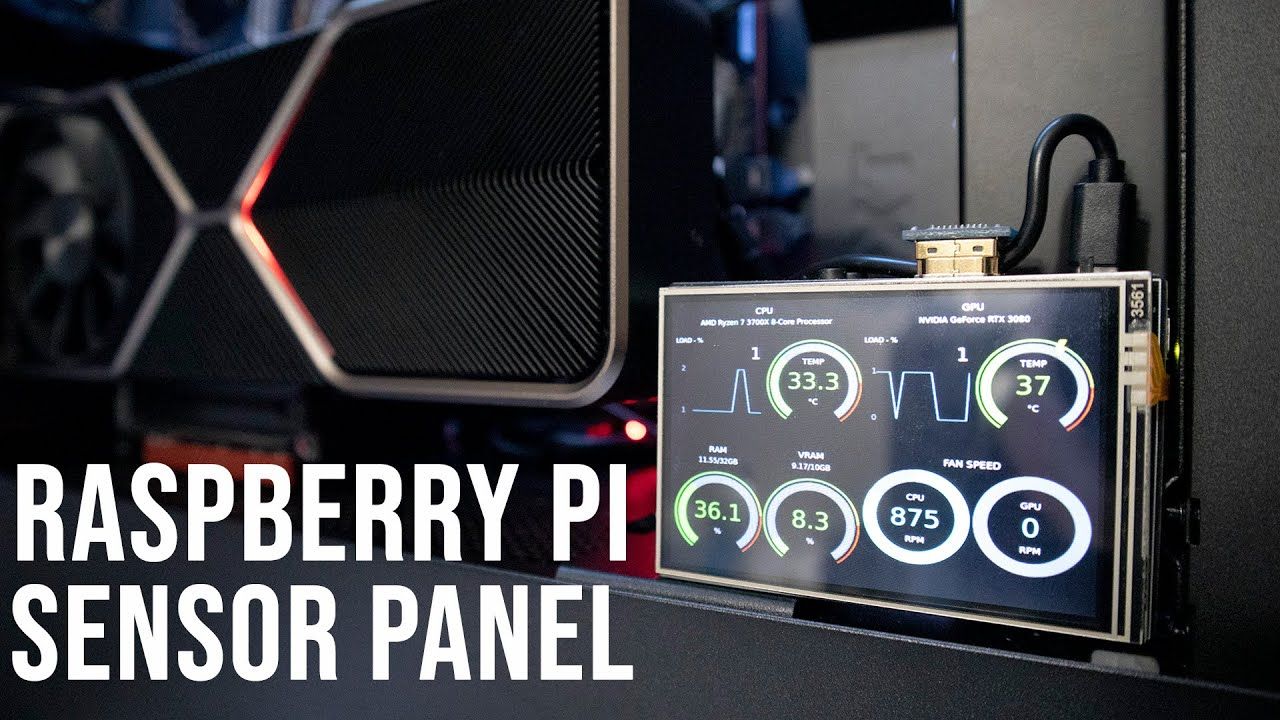
Keeping an eye on your PC’s performance isn’t just for geeks anymore. A Raspberry pi System Monitor for PC can do just that. Whether you’re a gamer, programmer, or just someone who relies on your computer to get stuff done, knowing what’s going on under the hood can help you optimize speeds, prevent crashes, and generally keep things running smoothly.
In this guide, I’ll show you how to build your own totally custom Raspberry Pi-powered system monitor that gives you nerd-level insights into your PC’s internals – for a fraction of the cost of some prepackaged solutions.
We’ll use a Raspberry Pi single-board computer along with software called Mobro to remotely monitor critical stats like CPU usage, memory, network speeds, temperatures, and more. You can even set custom alerts and notifications for when certain thresholds are crossed.
I’ll walk you through everything you need including:
Choosing the right Pi hardware and display
Downloading and installing the software on both your PC and Pi
Customizing the look and feel of the display
Advanced tweaks for power users
Troubleshooting any issues
And way more!
So if you’re looking to keep better tabs on your computer and make sure you’re getting the most out of your system, stick with me. This project is fun, useful, and can seriously improve your PC experience. Let’s dive in!
Choose your Raspberry Pi model
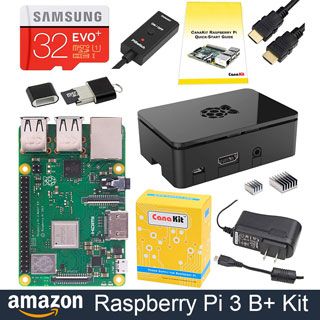
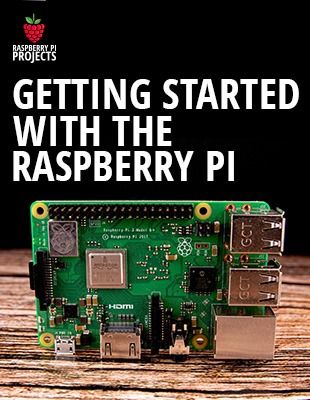
When it comes to Raspberry Pis, you’ve got options – lots of them. There’s the OG Pi 3 B+, the newer Pi 4 models, and the ultra compact Pi Zero 2. With so many choices, how do you know which one to use for your DIY system monitor?
For this build, I recommend going with the Raspberry Pi 4 with 4GB of RAM. The extra memory and faster processor give it an edge over other models when running intensive monitoring software. Plus, you’ll have plenty of headroom for adding more advanced features down the road.
The Pi Zero 2 is super small and affordable, but lacks the horsepower to handle a bunch of real-time graphs and notifications. And the Pi 3 B+ is starting to show its age – the Pi 4 is the new hotness.
As for displays, you’ve got options there too. The official Raspberry Pi display is solid bang-for-buck. But any monitor or TV with an HDMI port will work. Heck, you can even use that old 1080p screen you have collecting dust.
Touchscreens open up some interactive possibilities, letting you control or toggle monitoring stats directly from the display. The official Pi touchscreen is slick but pricey – there are cheaper alternatives available too.
One thing to consider is the placement and form factor you want. Do you plan to mount it inside your PC case or set it on your desk? Is portability a priority? Think about the optimal size and ergonomics for your use.
Finally, don’t forget to pick up a case. You’ll want something that fits your Pi model and chosen display. Make sure it has cutouts in the right places for access to ports and heat dissipation. A complete kit can save you some headaches.
With the right Raspberry Pi model and display, you’ll be ready to start assembling your DIY monitoring rig in no time!
Installing software on PC
The first bit of software we need to get up and running is Mobro on your Windows PC. This handy utility does the heavy lifting of monitoring your system specs and making the data available for the Raspberry Pi to display.
Go to the Mobro website and download the latest Windows installer. Run through the installation prompts to get it set up on your PC.
Once installed, launch Mobro and you’ll see the management dashboard. Make sure the server is running by checking the system tray icon. Click on Settings and bind it to a TCP port for remote access. I recommend sticking with the default port 42100.
For more detailed hardware analytics, you can also install optional software like HWInfo or AIDA64. I’m a fan of HWInfo – it gives you crazy amounts of sensor data from your CPU, GPU, storage drives, and more.
With the base software installed, we need to configure it to allow the Raspberry Pi to connect and read monitoring data over the network. Hop back into Mobro’s settings and make sure “Allow Remote Connections” is enabled under the Access Control tab.
That should do it for the Windows side of things! Connect your Pi to the same network as your PC and it will automatically discover the Mobro server and start slurping down all that sweet performance data.
If you’re having trouble getting Mobro to connect remotely, make sure your firewall isn’t blocking access on port 42100. You may need to create exceptions for the Mobro and HWInfo executables. A bit of Googling should help troubleshoot any lingering connection issues.
Preparing the Raspberry Pi
Prepping the Raspberry Pi to be your system monitor display is pretty straightforward.
First, use the Raspberry Pi Imager to install Raspberry Pi OS on your microSD card. The standard Debian version with desktop works best here.
With the OS loaded, you can configure your Pi in a few ways. If you have a monitor, keyboard, and mouse handy, you can hook them up directly and work through first boot.
But you can also go headless by pre-configuring your WiFi credentials in the OS image before booting up. This lets you access your Pi without any peripherals attached.
On first boot, step through the prompts to change passwords, configure WiFi, and enable SSH. This last part is crucial – it allows you to remotely access the command line and desktop.
Once your Pi is on the network, SSH in from another computer to finish setup. Run the usual commands like raspi-config to expand the file system and tweak settings.
You can also remote access the full Raspberry Pi desktop using VNC software. RealVNC works great and even allows you to view the Pi desktop right in your browser.
With your Pi prepped, download and install the Mobro client from their website. The install wizard makes it quick and easy.
The client will automatically detect the Mobro server on your Windows PC, assuming they’re on the same network. You may need to tweak firewall settings if it can’t find the server.
Once connected, the Mobro client will begin funneling system data from your PC to the Raspberry Pi. You can fully configure the look and feel of the dashboard display right from the Pi.
That covers the basics of prepping your Pi! With a bit of setup, you’ll be ready to customize the perfect remote monitoring dashboard.
Customizing the display
Now for the really fun part – customizing your Raspberry Pi display to show the PC performance stats and alerts you care about.
In the Mobro dashboard on your Pi, click on the settings icon to tweak what’s displayed. You can add and remove monitor widgets, edit their properties, and drag to rearrange the layout.
I recommend monitoring key stats like:
CPU usage percentage and temps
RAM usage and swap file stats
GPU usage and temps for gaming rigs
Network speeds and ping
Storage space and disk activity
Play around to build a display that suits your needs. Just drag and drop widgets to design the perfect layout.
In the Look & Feel tab, you can customize colors, fonts, backgrounds and more. Make it blend in with your desktop or go crazy with rainbow animations—your choice!
For notifications, head to the Alerting tab. Here you can have the Pi display system alerts when certain thresholds are exceeded, like CPU overheating or low disk space.
You can also configure email, SMS, or push alerts for remote monitoring while away from your desk. Don’t let your PC meltdown go unnoticed!
If the dashboard isn’t showing properly on your Pi display, make sure the resolution is set correctly under Device Management. Try tweaking the width/height percentages or pixel dimensions.
For advanced customization, the Content tab lets you inject HTML, CSS, and JavaScript code. This opens options like auto-hiding widgets and creating fancy graphics.
If you’re a real coding wiz, you can tap into the Mobro API using Python to build custom scripts that interact with your PC sensors. The possibilities here are endless!
Mobro makes it super easy to build a tailored system monitor unique to your needs. In just a few clicks, your essential PC stats can be displayed and monitored from anywhere.
Going further
Got your Raspberry Pi system monitor running and want to take it to the next level? There’s tons of possibilities for building on this project!
You could integrate your monitor with home automation platforms like Home Assistant to display system info on wall panels throughout your house.
For deeper data analysis, try adding live graphing of performance metrics over time. This lets you visualize usage patterns and trends.
Mobile apps like Raspberry Pi Remote allow controlling and monitoring your Pi from smartphones and tablets. Imagine getting instant alerts when your PC overheats, no matter where you are!
If wall-mounting your display, a French cleat system makes installation easy. Just hang a piece of wood on the wall with a lip at the top and “hook” your monitor right on.
For a clean in-case installation, use standoffs and double-sided tape to securely mount your Pi and display inside. This takes your PC modding game to the next level.
Be sure to keep your Pi OS and Mobro software updated for best performance and new features. Scheduling automatic updates helps ensure you don’t miss releases.
If you run into trouble, the Raspberry Pi and Mobro forums are great resources. Chances are someone else has solved your problem already. Don’t be shy about asking the communities!
This project is just the beginning. With the right hardware and a bit of coding know-how, you can build a fully customized monitoring and analytics platform tailored to your needs. The possibilities are endless!
Wrap up
And that wraps up this guide on building a custom Raspberry Pi system monitor!
We covered how to install Mobro for easy access to your PC’s performance stats. Then setup WiFi, remoting access, and dashboards on the Pi display.
With some simple customization, you can now monitor your PC like a pro – no expensive prebuilt solution required!
A Pi-based monitor gives you total flexibility to track the metrics you care about. And provide alerts to keep your system in tip-top shape.
This project can easily be expanded by tapping into Mobro’s advanced features and integrating with home automation systems. The options are limitless!
Let me know in the comments if you have any other ideas for enhancements or features you’d like to see covered. And share pics of your finished Pi monitoring projects!
I hope you found this guide helpful. With a Raspberry Pi, Mobro, and a bit of elbow grease, you’ll have an awesome DIY system monitor in no time. Happy building!
○○○ LINKS ○○○
ModBros Discord ► https://discord.gg/DSNX4ds
Mod Bros ► https://www.mod-bros.com/
3.5 screen ► https://amzn.to/3qAsli0
Raspberry Pi 3 ► https://amzn.to/3mOqvry


