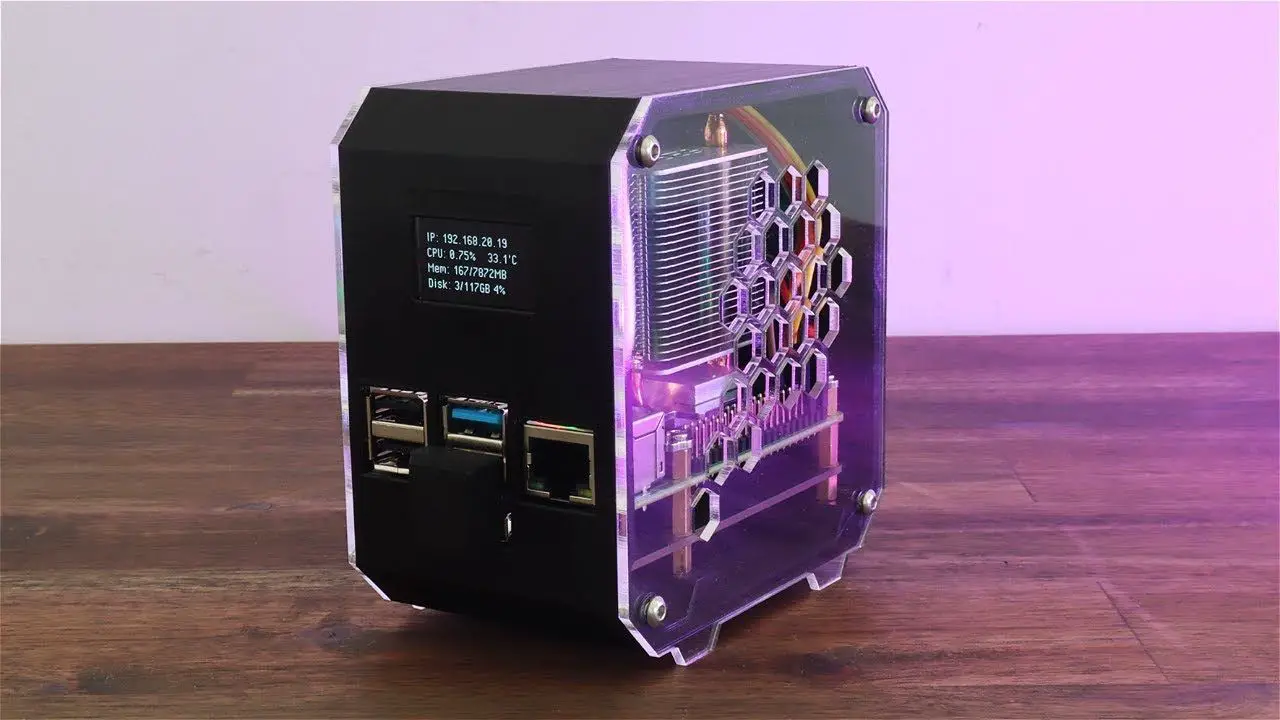
In this video, I’m going to be taking my previous desktop case design and adapting it to accommodate an SSD underneath the Pi.
Read my write up of the build and download the Python display script – https://www.the-diy-life.com/raspberry-pi-4-ssd-case-with-stats-display/
Pi SSD Case Kit – https://etsy.me/3ldd5Ha
Download the 3D print and laser cutting files to make your own case – https://etsy.me/3DvyEJt
What You Need For This Project
Raspberry Pi 4B – https://amzn.to/2Ye1Wga
Ice Tower Cooler – https://amzn.to/3iudvXF
mSATA SSD Shield – https://amzn.to/3uESsGO
mSATA SSD – https://amzn.to/3uEdMMN
MicroSD Card (For Setup) – https://amzn.to/3BogSH2
I2C OLED Display – https://amzn.to/3oyidrx
15cm Female to Female Ribbon Cable – https://amzn.to/3lcZ7Fj
2mm Clear Acrylic – https://amzn.to/2ZNNlsw
9 x M3x8mm Button Head Screws – https://amzn.to/2PRw6Cd
4 x M3 Nuts – https://amzn.to/3aK0uCB
Equipment Used
Creality Ender 3 V2 3D Printer – https://amzn.to/2YsgM39
K40 Laser Cutter – https://amzn.to/2YqOVAb
Electric Screwdriver – https://amzn.to/2Yfnzg4
Some of the above parts are affiliate links. By purchasing products through the above links, you’ll be supporting this channel, with no additional cost to you.
If you’ve got any ideas for Raspberry Pi, Arduino, or other Electronics projects or tutorials you’d like to see, let me know in the comments section.
source